| Author | Message | ||
Gowindward |
I gutted a couple of Uly seats last night to start custom work on them and found the results interesting. It looks like from the Low seat foam that the tooling must have been a rush job, to get it to market quick after all the negative feedback from the standard seat being too tall. First the low gel seat with the foam off the pan.  The gel insert....as sticky as gorilla snot and I should know...Go PSU!  Here the gel insert removed with special parting compound used. Looks like a big reason for the get was to cover all the rough stuff in the pan, while using a quick tooled foam bun. 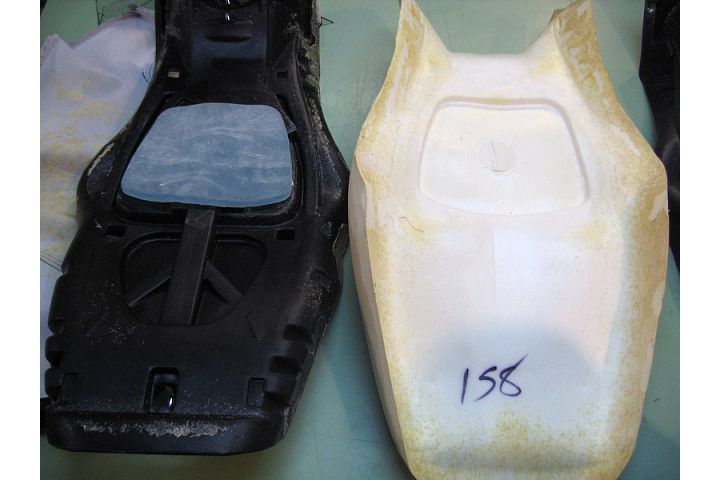 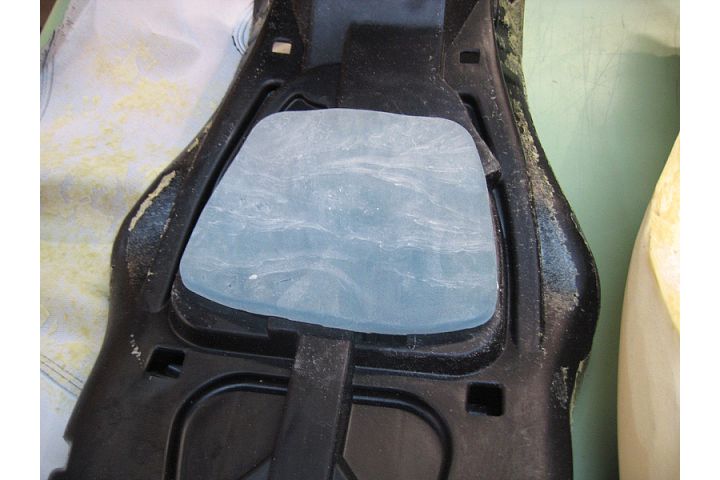 Looks like some after molding work was done on the foam. See the rough surfaces on the tail.  A little scrim foam used up on the nose. 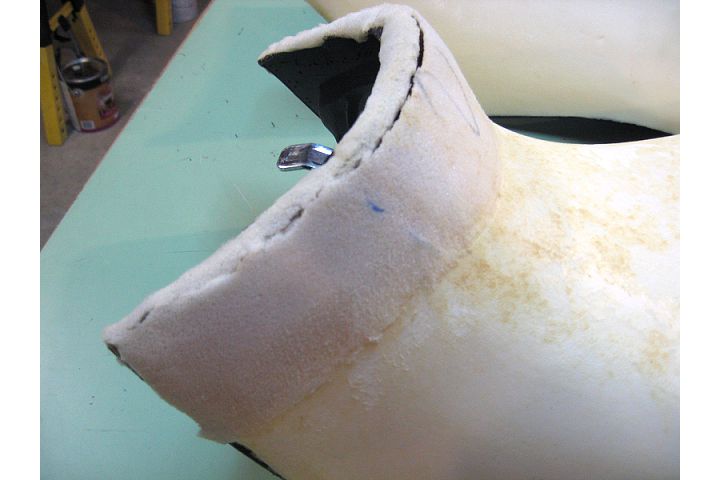 Bottom edge on the low is also been work post foam molding.  The standard seat with the foam off the seat pan. Notice of the foam has the same contours as the seat pan. As most of you know the foam is pretty different on the two seat for firmness.  Low seat with a 10lb dumbbell resting on it.  Standard seat with same 10lb dumbbell resting on it. It sinks in a bit more, and the foam is more rubber like. Certainly a different mix was used. 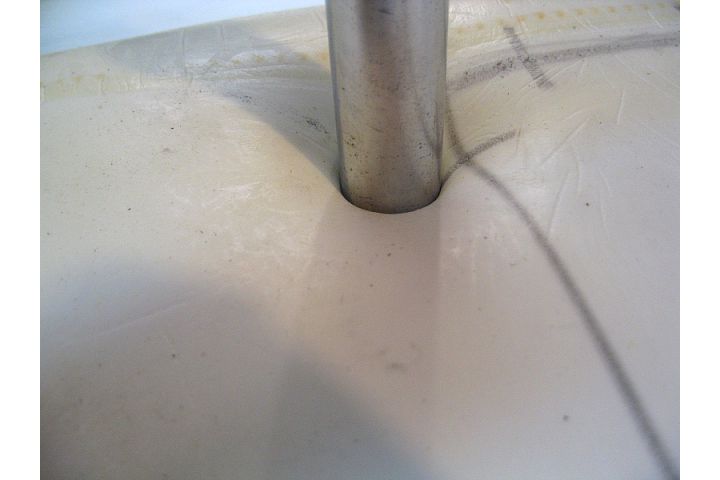 Okay last of the Naked photos with them side by side. 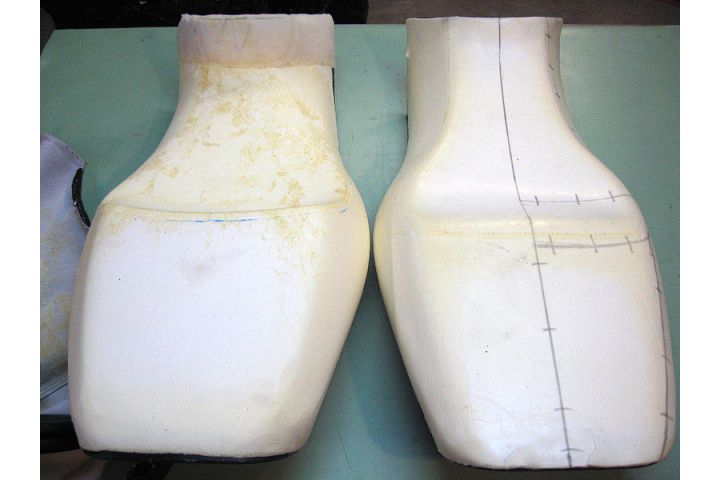 Off to get a couple of makeovers. LOL | ||
Firstbatch |
Cool,,,thanks for posting. Seat mods are a fun DIY effort. Are you planing on laminating new foam on the old foam and then carving/sanding to shape? | ||
Rocketsprink |
is is possible to take the standard seat and make a low by just trimming out some of the foam? Or would it be like sitting on a brick? Would the cover fit back ok? I have a standard seat sitting in my basement and I'm up for some at home seat mods. | ||
Gowindward |
Actually this is being done on a closed course...professional driver...yada yada yada....please don't try this at home kind of thing. LOL I will take the standard seat and turn it into a deluxe low seat with Pro Pad gel insert and orthopedic memory foam, and will be stitching up a new custom cover. The old cover would fit like a stretched out sweater. The low seat will be getting a similar treatment. | ||
Firstbatch |
Sure Rock...that is what I did to the original 2006 seat. Moved the rise back and leveled out the seating platform. At the same time lowered the "horn" area up front to make it just bit more comfortable for the stand-over at a stop. Great results ! 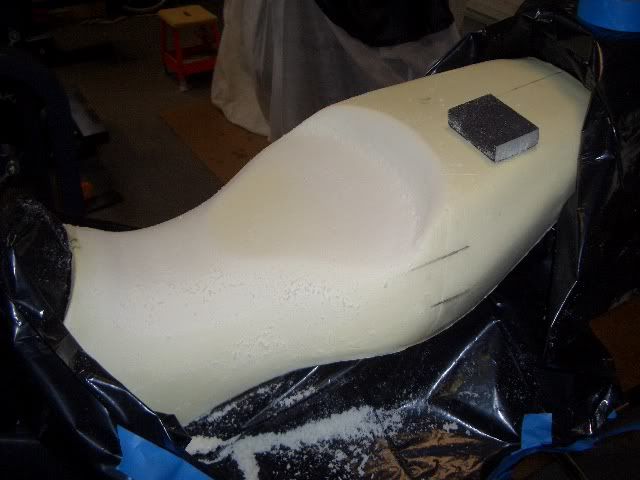 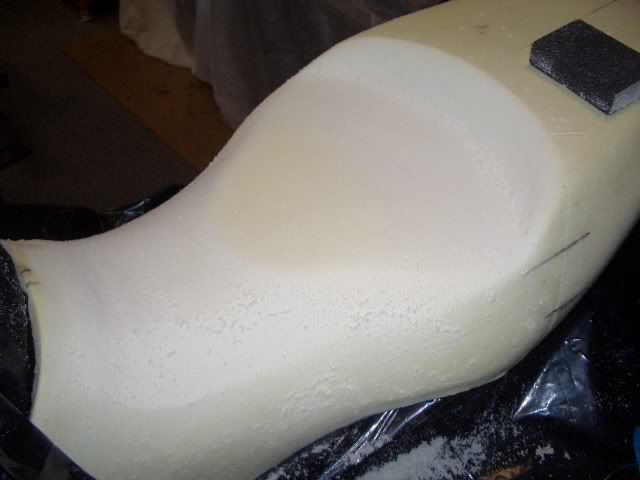 | ||
Bosh |
Firstbatch, I was thinking of doing exactly of what you did to your seat. Were you able to use the stock cover or did you have to mod it to make it fit right? | ||
Firstbatch |
I re-used the stock cover`......it works but certainly the seams do not line up with new contours. There must be at least 150 staples that hold the cover in place. I probably put half that many back. Now that I am satisfied with the shape, which by the way I took on a few test rides during the process, I would like to get it professionally covered. Gowinward, I looked at your profile and see you do some great looking seats at Baldwin....can you do any recovers on something like mine? | ||
Gowindward |
Kevin, Yes and it looks like you did a good job on symmetry.  You must have a sculptors thumb and eye for it. LOL You must have a sculptors thumb and eye for it. LOL | ||
Firstbatch |
Ok, cool...I will be in touch. |