| Author | Message | ||
J0hn0tt0 |
Hey, guys. I ordered the service kit for connector 77 from Chicago HD. I installed it today, but realized that there may be a slight chance that I mixed up the pos/neg wires upon installation of the plugs. I did Fatty's battery meter LED light mod, so I have an easy way to see how the battery's doing. When I started up the bike for the first time with the new connector installed, the LED light is flashing red, just like it is before I start up the bike. Usually, it goes to green almost immediately upon starting up the bike. Revving to 3000 RPM did nothing, as well -- still flashed red. I fooked up, didn't I? (Message edited by j0hn0tt0 on April 27, 2009) | ||
Froggy |
Mine is always red or yellow at idle then turns green when I am going. Then again, the espresso maker takes quite a bit of juice to keep everything warm and puts a real beating on my charging system. | ||
J0hn0tt0 |
But mine goes green within the first 3 seconds of starting the bike, since I have nothing other than my GPS running off the bike. Is there a definite way to tell if I reversed the polarity? | ||
J0hn0tt0 |
Well, something's definitely wrong. I hooked up the bike to a battery tender for about an hour. When I started it up, the light was steady red for about 15-20 seconds then began flashing red. (Message edited by j0hn0tt0 on April 27, 2009) | ||
Ronmold |
Unhook the new 77 connector & see if you can hook 2 alligator test clip leads or whatever to the VR side of the connector. Hook up an old working headlight to the leads to act as a test load. Start the engine and see if the headlight lights up to a normal level. You might have to go a bit above idle but if the VR (voltage regulator) is working properly the headlight should not get much brighter as RPM's rise. If that all works you can put a test meter on it to find out polarity. It's insane that there are 2 black leads for a DC circuit. | ||
J0hn0tt0 |
Thanks a lot for the tip, Ronmold. I don't think I have any kind of old headlight or anything like that. I have a hand-held voltmeter, though. Can I just hook up the voltmeter to the leads and monitor the voltage like that? If so, what range should I be looking for? | ||
Ronmold |
You should have some kind of load, maybe a tail lite bulb? Solder a wire across both bumps on the bottom and wrap a wire around the base. | ||
Fastmag |
I just put a new VR on my bike and tore that connector apart with out paying much attention. Then I had the question of which wire goes where. On the new connector it self there is a 1 and 2 on the connector. It only plugs on one direction. 1=Black wire 2=red wire. (from the charging system diagram in the book) also from the VR side (If looking at the wires coming out of the bottom. The red wire connects to the wire that is all the way to the right. Black wire is second wire. | ||
Pso |
JohnOtto-I hope you get it worked out. In addition to that little slip up how did the conversion go. I have the upgrade kit on my work bench and noticed that the instructions specify specific tools. Will a simple set of electrical connection crimping pliers work? | ||
Thunderbox |
I just looked at my manual and the 77 connector only has 2 wires going to it. I checked it on the bike and it has one red and one black. I can't have the only bike with a 2 wire 77 connector. The other one down there is the 46 connector and has 3 wires. | ||
Skifastbadly |
The 77 connector has two wires. On the mail side, one red and one black wire. On the female side, two black wires. Mark them well, and write down what you mark. When I eliminated the 77 connector and just crimped the wires together, I marked the wire on the female (Voltage Regulator) side with tape. Then I promptly forgot whether I marked the red side or the black side. I had to reverse engineer my own thought process..."Why would I have marked a black side, when it's already black?" While confident I had connected it correctly, it was still a sphincter pucker when I turned the key on. Fortunately 500 miles later, everything seems to be running normally so I assume I got it right. Good luck. | ||
Mnrider |
Old mechanic's trick,do 1 wire at a time. I also cut out and soldered mine. | ||
Oddsc |
I just checked my 77 & it looks screwed. Should I order the kit or just heat shrink splice connect it together? While the bike was up I checked the rear bearings.  looks pretty good I think. 15K on an '06. I always pressure wash the bike & always torque wrench the rear axle | ||
Ronmold |
Use these with some dielectric grease 50A rated 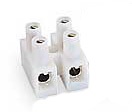 | ||
Skifastbadly |
I went to home depot and bought a submersible pump wiring kit, cost five bucks, contains two crimp connectors and waterproof shrink tubes. worked like a champ | ||
Pirnie |
If the positive and negative wires are reversed, instead of casting a beam, your HIDs should actually pull light in toward the Uly, creating a black hole in front of the bike. If you pass through, you'll enter a universe with perfect wiring, cool header pipes, unbreakable drive belts and life-time bearings.  Sorry, I just couldn't resist the temptation. | ||
Ronmold |
Yes, true but your bike will also weigh 346 tons! | ||
Etennuly |
Yes, true but your bike will also weigh 346 tons! Most of that will be chrome!  When I eliminated my '77'I did one wire at a time; black wire to black wire, red wire to black wire. Then I thought, "why the heck would they both be black?" | ||
Smolt |
What is that device? | ||
Michael1 |
Does any one know the P/N for the 77 connector Service Kit? I stopped into a dealer today and they didn't have a clue. Thanks.... | ||
Tootal |
Wow, the dealer didn't have a clue, why I just can't believe that!!!  | ||
Ronmold |
Barrier strips, hardware stores, Home Depot have them. They're small, field serviceable with a small screwdriver and make a screw clamped connection instead of just a spring contact connection. | ||
Froggy |
Y1312.02A8 | ||
J0hn0tt0 |
Hey, guys. Sorry I disappeared. I've had term papers and finals up my ass but I have a couple of free hours today, so I'm going to try to isolate the issue and come up with a game plan. One possible explanation could be that since I didn't have the specific HD crimper that the instructions called for, my shoddy crimping job may be to blame, since all I have is some multi-use crimping tool and the crimps were less than stellar. If that's so, I'm just going to take a trip to Home Depot and pick up some splicers to get the job done right. I'm going to go dive into the Uly right now. I can't believe how much I missed riding it this week, while it's been down. This bike is here to STAY, that's for sure.
I used some standard crimping pliers, and it took a bit of wrangling for me to feel comfortable with the crimp. Other than the crimping, it's a REAL easy job. I guess it's up to you and your crimping skills/knowledge. I have very little of each, since the only thing I crimp are my own ethernet cables.
All of our 77 connectors have 2 wires. The problem is that, on one side of the connection, the wires are both black. Therefore, if you don't keep track of which black wire is pos/neg, you can get yourself in a jam, like I did. Thanks for all the words of wisdom and advice, guys. I love this community. | ||
J0hn0tt0 |
Ok, here's the deal: I used my hand-held voltmeter/multimeter thingy to determine that I did, indeed, reverse polarity (the voltmeter shows a negative sign if the polarity is reversed). So, the wire on the VR side that I wired to the pos wire on the battery side was the neg wire. I hooked up the voltmeter to the VR wires and started the bike. The voltage started a little over 0 and steadily rose .01 volt every second. So, after 100 seconds, it rose to 1V. 200 seconds garnered 2V. What does this mean? Revving it did little to nothing in the voltage output; it still rose approx .01 every second. (Message edited by j0hn0tt0 on May 02, 2009) | ||
Snojet |
"off the cuff" I would suspect the VR being fried. I'll have to look into this. Good luck! | ||
J0hn0tt0 |
That sucks. Anyone have a part number for a VR? Would this affect the stator? | ||
Snojet |
Hey John, I got home to my manuals and found that the 77 connector wires go to the battery fuse then on to the Pos side of Bat (red wire) and the black wire goes directly to the grounding point for your battery, which connects to the big black wire for the Bat(black wire). Also remember that the VR has two wire runs off it. (to different connectors) VR - part # Y0302.02A8 Stator Assy. - part # 29971-02Y (if needed) this could be your problem. Further T/S needs to be done. I'm sure both parts are expensive. FYI, for your battery voltage? @ 100% charge it will be 12.7/ @ 75% charge it will be 12.6/ @ 50% charge it will be 12.3/ @ 25% charge it will be 12.0/ 0 charge it will be 11.8. Give me a PM and I can help you further troubleshoot. In my manual there is a proceedure for checking both the VR and the Stator/rotor assy. To much to type here. Dude, you should get the service manual. It explains the charging system well and provides the troubleshooting too. I'll post where I picked up mine, as well as the parts catalog. It was cheaper than at HD or other regular/normal sources. | ||
Snojet |
I bought my service manual from www.Lshd1.com for $48 + ($5.63 shipping). That was the cheapest that I could find. Maybe someone else did better. Here is the link... http://www.lshd1.com/servlet/Categories Because I shop around (using the web), bought my parts catalog from Ironmachine for $48.95. Here is the link... https://www.ironmachine.com/advanced_search_result .php?keywords=99575-06y&osCsid=rarahdkq9vvco5shv9q b1pja74 | ||
Snojet |
John, Sorry, I just read your earlier posts again and realized that you already have a manual. (This is the problem when you have a rough day at work and hit the Markers Mark - just one, and sipping the double shot - and getting on the computer and trying to help someone. Wife and kids are out of town) hehehehe. Anyway, I believe your Stator assy is fried. From your earlier readings/posts (if you were on connector 46). This is based upon on what page 7-31 (Service Manual) of the AC Output Check results state. See steps 1a thru 2b. Sorry for the bad news. Snojet |