| Author | Message | ||
Ejc |
I'm considering purchasing the factory heated grips for my '06 Uly. However, when I inspected the '08 on the showroom floor, I noticed quit a bit of play in the throttle grip. Has this been an issue for anyone? Thanks in advance for your responses. | ||
Uly1080 |
I just installed the Factory '08 grips on my '07 and love them. I didn't notice any increased throttle play, and the fit and finish is perfect. Having absolutely no idea what I was doing, it took me about 2 hours and turned out great. I know quite a few folks have used the poly heaters and gotten good results, but I can say the OEM Factory Grips look great and get HOT very quickly. Good Luck. | ||
Electraglider_1997 |
Throttles have a pull cable and a retracting cable. If there is play then it is probably because the cables need adjustment. | ||
Court |
>>>If there is play then it is probably because the cables need adjustment. I agree. It is unrelated to the heated grips . . .my favorite single Buell advancement.  | ||
Danger_dave |
>>my favorite single Buell advancement. << HTFU | ||
Geopatr |
I installed them on my 06 Uly in about one hour and they are awesome. Well worth the extra cost | ||
Ejc |
Thanks again. I shall proceed. | ||
Kuuud |
I just installed a set on my Uly. Quite easy. I've had sets on 3 Harleys but these are HOT!!! I'm afraid to try high. I've only used low and have to turn the grips off for a while when low gets too hot. | ||
Spike |
Quick question about the factory heated grips: Can the grips themselves be replaced without losing the heating element, or is it built into the grips? | ||
Bearly |
Just thought I'd throw a few pictures up when I installed my headed grips a couple of weeks ago. My intent is to show other just how easy it is to install. I hope I didn't make it looks hard here. I've installed it on our (the house monster's XB12Ss) Lightning and will next week on the 1125R. The kit comes all in one small box. A sealed package that contains zip ties, stand off plugs hex wrench, two self tapping screws and a drill bit which is worthless (more on that later). There is a drill fixture, two hand grips and a new right hand switch cluster. The kit also contains four pages of fairly detailed instructions for the Uly, Fire bolt, Lightnings and the 1125R. 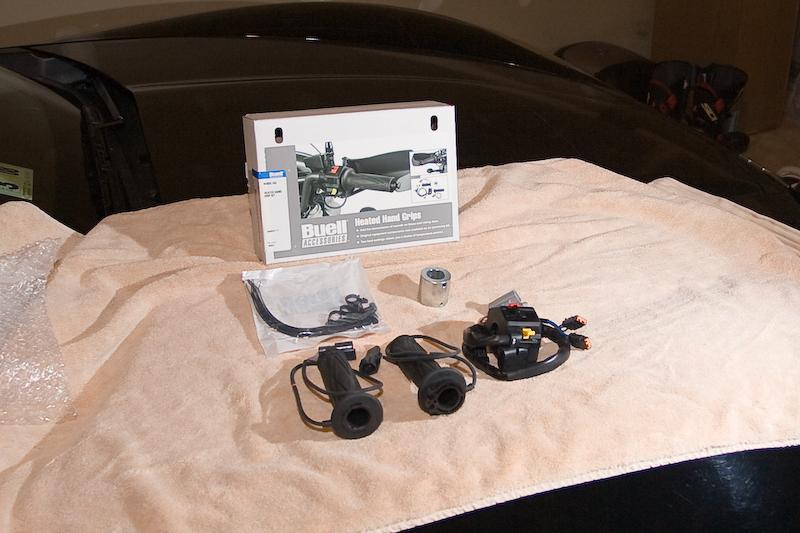 The first thing you would do on the Uly is to remove the wind screen. Of course Buell made this so easy. 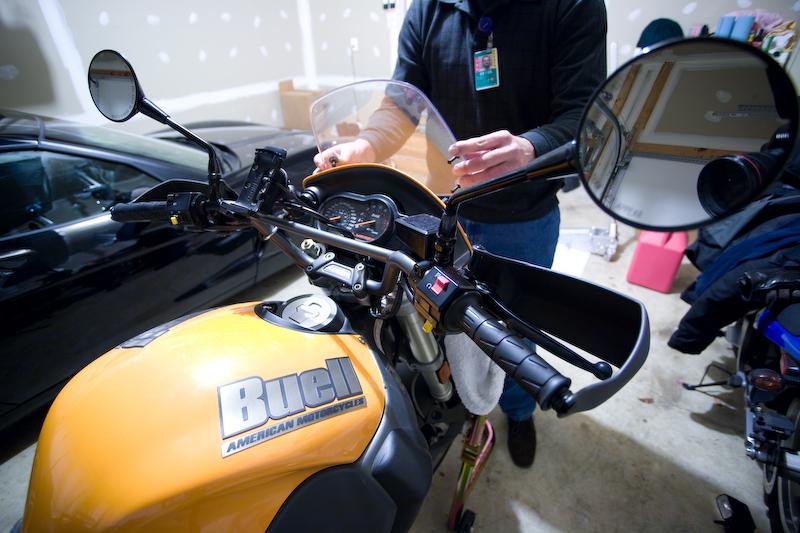 Next is to take the fly screen off which is 6 hex screws, three on each side. 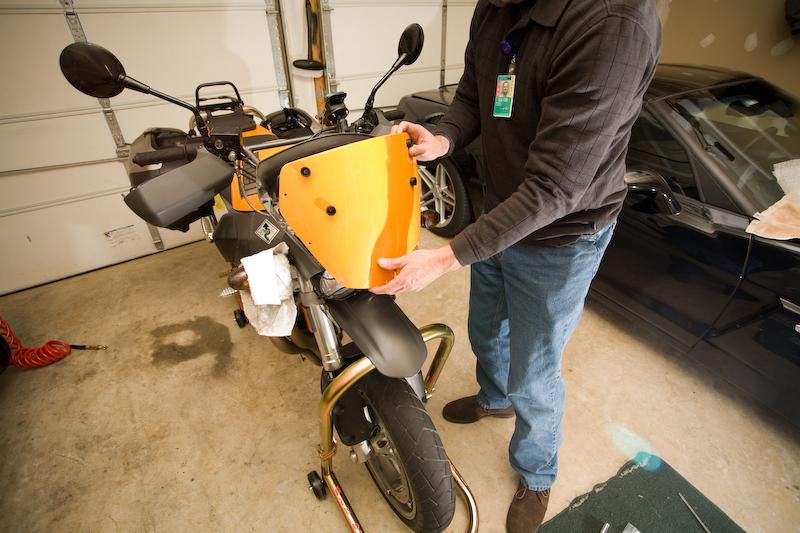 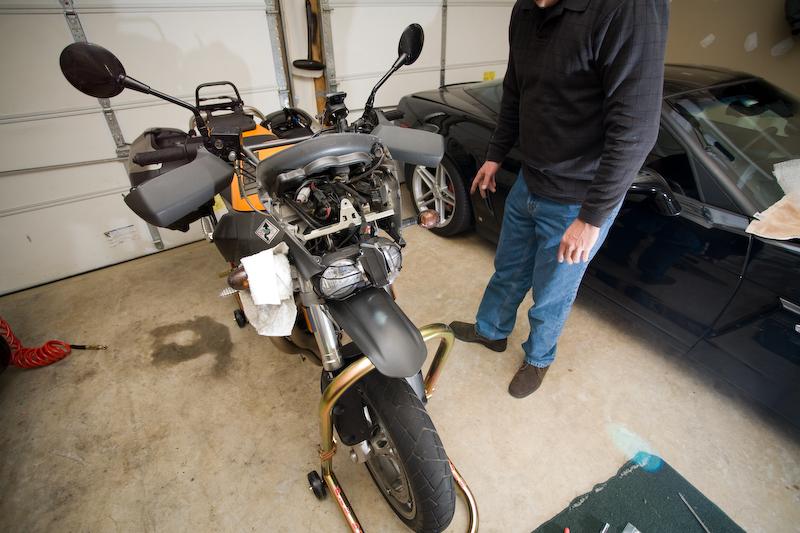 Next I took the Left handle bar switch cluster off of the bars by removing the two hex screws and separating the two halves. Just let these dangle for installation later. 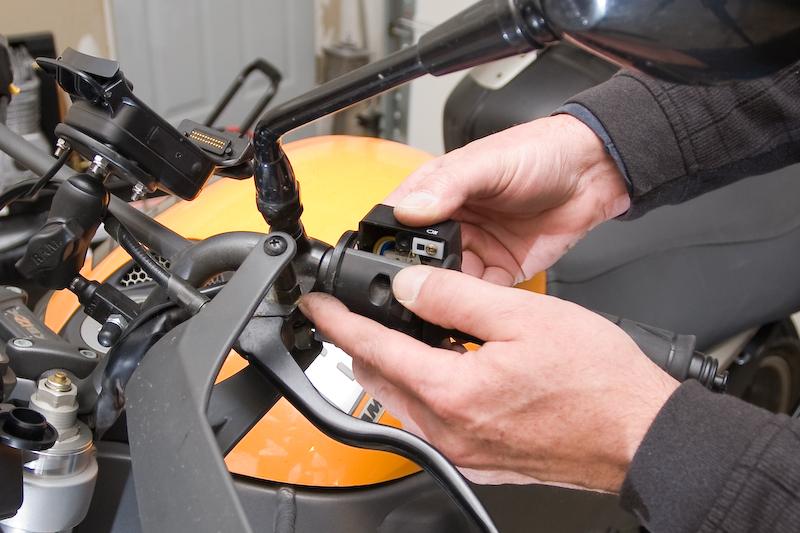 After that, I got out a box cutter and some spare blades and cut off the left hand grip. It's glued on. 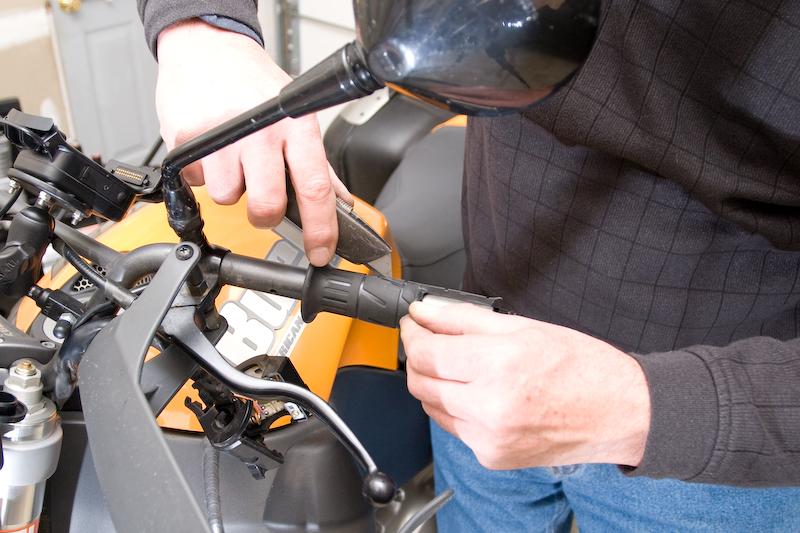 You have to scrap off the remaining rubber and glue from the bar to ease installation of the new grip later. 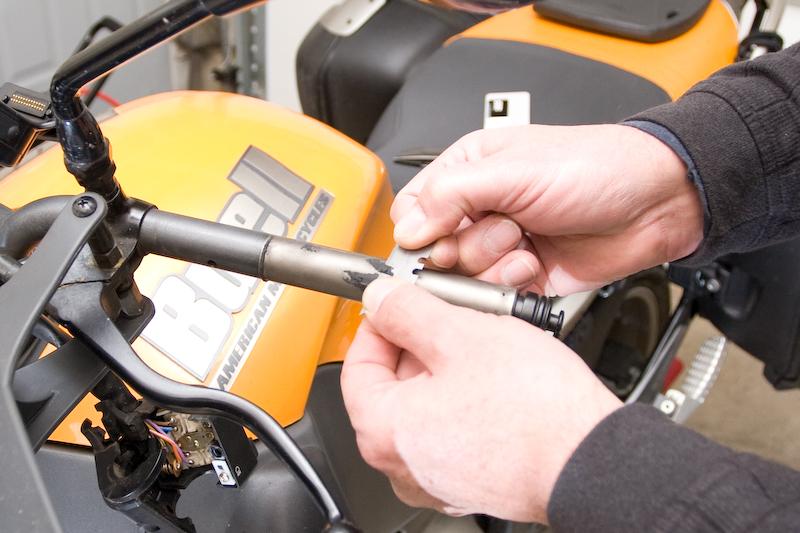 You find a locating hole for the Left switch cluster on the forward side of the bar. Take the drilling template from the kit and slide up on the bar with the set screw inboard. Tighten the set screw in the switch cluster locating hole. This sets the location for the two holes you are about to drill for the left grip. This is the hardest part of the installation. The Chrome Moly bars are hard and the drill bit provided seems to be softer than the bars as it will take plenty of cutting oil and time to just get one hole drilled. I recommend having a couple of extra hard (Cobalt, Titanium, 9/64ths, 3.6mm) bits to get through this part. There are two holes to drill and this took me as long to this as it took for the rest of the installation. Pressing too hard I broke two bits while installing on the Lightning. You have to swing the hand guards forward and loosen the mirror/ clutch mount (8mm) to drill the forward hole. 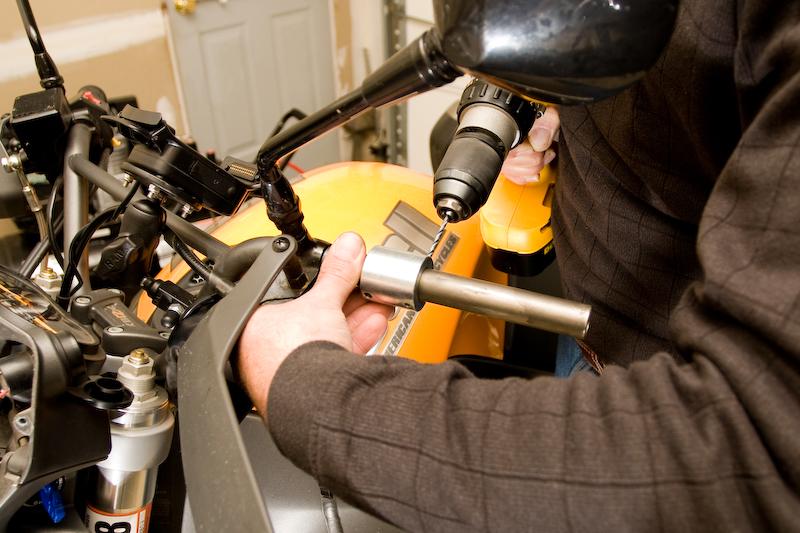 Next just remove the two screws on the left switch cluster and remove the back panel (forward side) on the right switch cluster. Note the routing of the throttle cables for future reference. Remove the cables from the right grip and discard the grip. 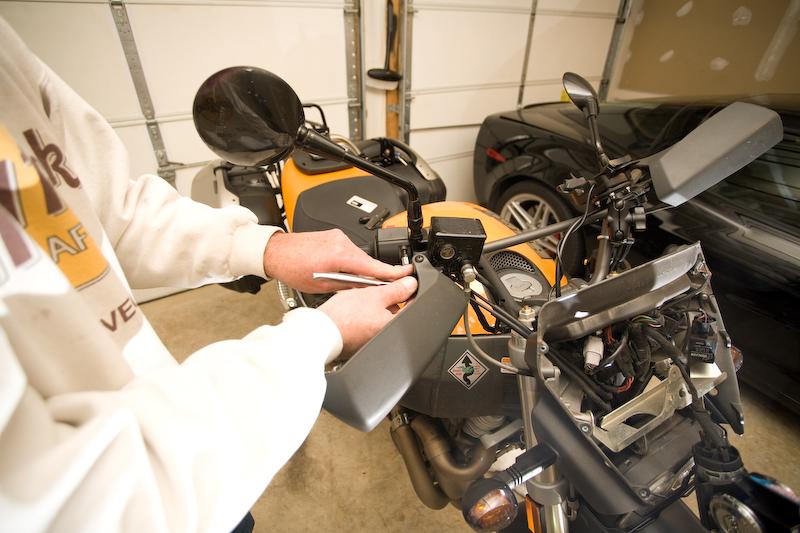 clip the Zip tie over the triple tree and remove the plastic stand offs on the handlebar. Follow the wire harness into the fly screen area and unplug the connector. Pull the wire bundle for this right hand cluster to rear out the fly screen area and put aside. You will be replacing this switch cluster and wire assembly. 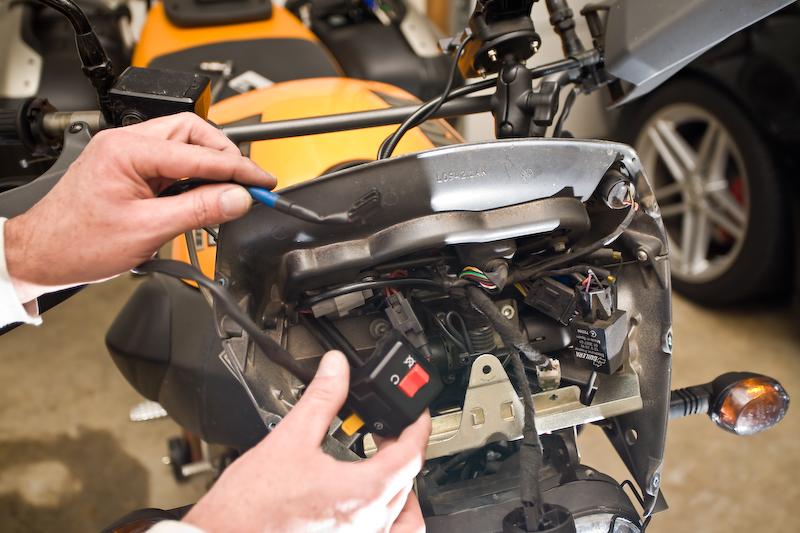 Good now you have all the preparation finished and all the old parts removed. Assembly from this point really takes about 20 minutes. Find the left hand grip in the kit and slide it up on the left bar end. Let the wire on the inside of the grip come off of the grip towards the ground. Fine the two, self tapping hex screws in the kit's plastic package. Pull the rubber inboard guard back with your thumb a bit and twist the screws through the little hole in the grip and through the holes you drilled in the left bar. (#20 torx). Replace the the left hand switch cluster making sure to locate the forward plate of the cluster in the existing hole in the bar. Replace the two hex screws in the cluster housing. Move the clutch lever back to proper position to taste and tighten the 8mm hex bolt. Run the wire for the left grip along with the left cluster switches along the same path as you found them. Zip tie a small loop (leave some slack) of the left grip wire, to the wire harness as it comes out of the left switch housing. Route the Grip wire all the way in to the fly screen area to plug in later. 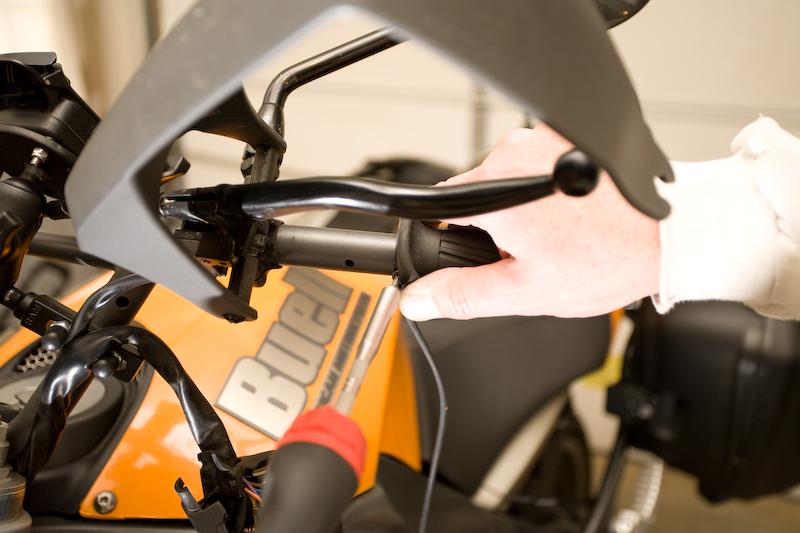 Move over to the right grip and slide the new heated grip from the kit onto the right bar. The maintenance manual is a great thing to have for any of this assembly procedure of course. The way that I found that is easy is to slide the return cable into the switch cluster housing and then slide the lead cable end into the aft slot with both of the slots up. Then slide the switch cluster over the grip and locate it near it's original position on the bar. Then take the lead (or ball end) of the throttle advance cable and hook it into the remaining slot in the grip. Slide the cable housing into the switch housing.  Then grab the backing housing for the right switch cluster (new) on to the whole mess while making sure to put the little locating tab into the locating hole on the bar. Then install the two hex screws. Simple? 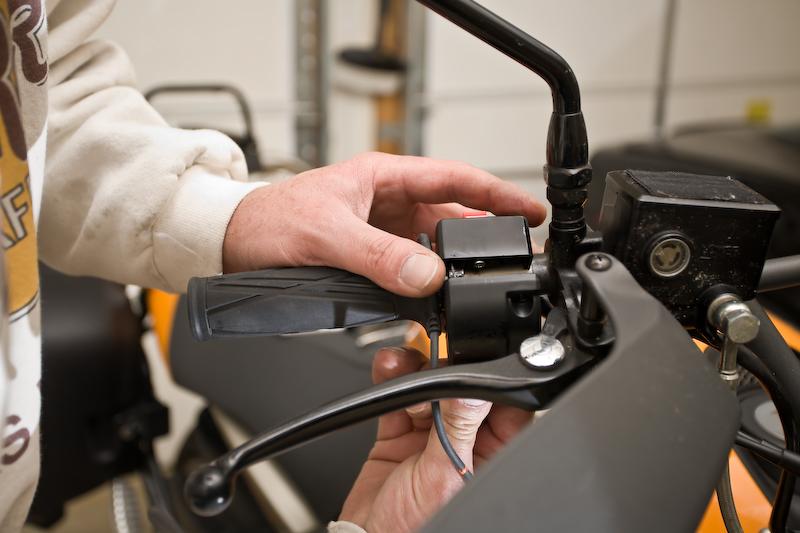 You want to want to make sure all the wire from the right side are routed correctly now. The only problem is that the new connectors will not fit under the handle bars on the right side. So get out a towel or a few rags and cover the tank. Using the appropriate hex driver remove the four screws holding the top clamp over the handle bars. Mine stuck to the handle bars which insured that I put the bars in exactly the same position that I found them in. Clean all the thread carefully. Route the wires in under the handle bars and in to the fly screen area and use RED thread locker to re install the bar clamps. Tighten the forward ones first then the back ones. Use the Maintenance manual here as I did and tighten them to 10 to 12 ft lbs. 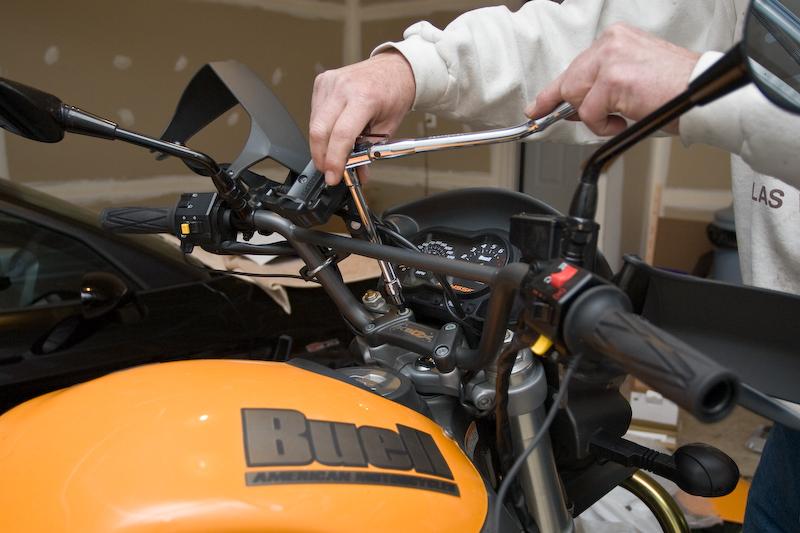 You may have to lift up slightly on the back edge of the instruments cluster to have them clear but run them straight out through the front of the fly screen. (not shown) Remember that first plug you disconnected? well plug that back in as there is new plug that will fit. You have a couple of new Gray connectors now in the new harness. So on the ULY, find the existing Gray connectors and unplug them in the fly screen area.  Simply plug the existing male connector into the new female connector and the existing female connector into the new male connector. You now have to tie off all the wires that run along the bars. Since the throttle has to move, you have to allow enough slack in the cable to allow full power baby. Buell has left you a clue in that there is a little orange mark on the cable from the right grip. They would like you to have this mark right at the inside of the Right Switch Cluster and no further. The picture shows the lead to the right grip tied off and the throttle at maximum power baby showing the clearance that you will need. 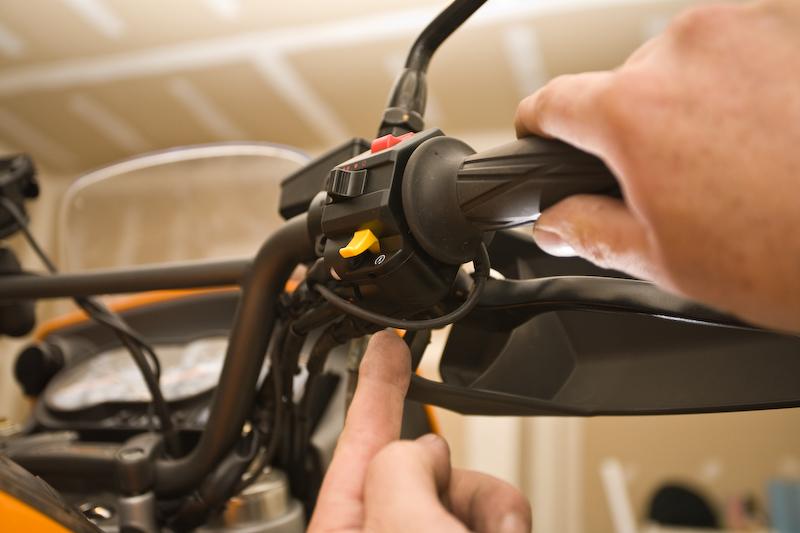 Tie the rest of the wires off as in the instructions replace the fly screen and your golden! 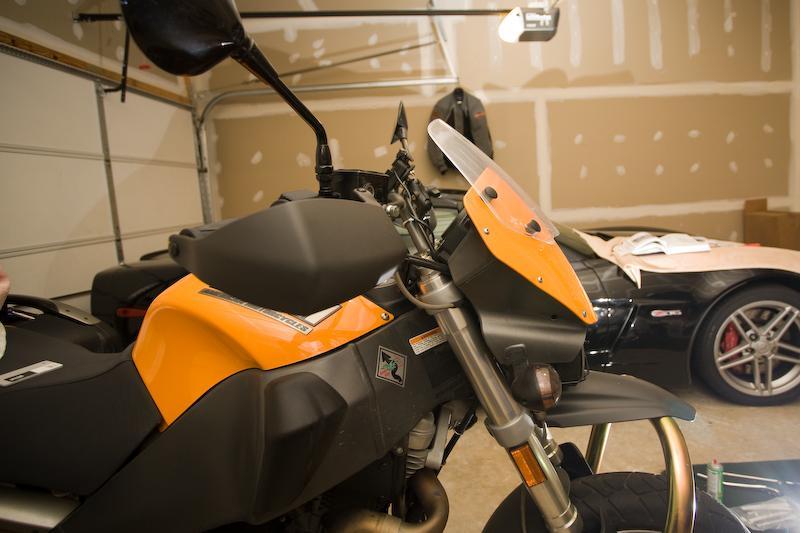 See, it really is a DIYS kinda job. I think anyone that lives above 33° north latitude or is planning to go above there will find them welcome. As I said, I did do the 06 XB12Ss Lightning as well. The parts guy didn't warn me (and they didn't know) that they gray connectors (an aux power line) doesn't exist on the lightning, so I got power for that loop from the head light circuit. You could, as was suggested to me run it all they way back to the batter through a relay if you wanted. Remember your mileage may very. I was just trying to encourage others to try it themselves. Enjoy. (Message edited by Bearly on December 28, 2007) | ||
Maximum |
Nice job Bearly...me like pictures!  | ||
Josh_ |
>the gray connectors (an aux power line) doesn't exist on the lightning, so I got power for that loop from the head light circuit. Got a wiring diagram or other pics? I want to setup non-factory grip warmers and make it as clean as possible. Thanks Josh | ||
Court |
Great write up . . . we need to make sure it's "find-able". Diggin' the Corvette in the background too! Thanks for sharing. Court (Message edited by court on December 28, 2007) | ||
Bearly |
Court: Finda-able? How do we make it finda able? Is that a vette? No that is my chevy work bench. Josh, I'm sorry I didn't take pictures of the Lightning install. The only wiring diagram that I have is in the service manual. Edit: BTW Josh, The aux connector on the 06 XB12Ss in under the seat aft of the battery. (Message edited by Bearly on December 28, 2007) | ||
Court |
Someone will get it into the knowledge vault or at least make sure it has "searchable" key words. Me? . I'm printing it out and putting it in my Ulysses service manual. Well done. | ||
Johnboy777 |
A Corvette workbench - how cool is that? | ||
Garyz28 |
Thank's for the detailed pic's. Your timing was perfect. I got a set of heated grips for my Uly for Christmas and I'm planning to put them on this weekend. | ||
12x9sl |
"A Corvette workbench - how cool is that?" No doubt-especially the Zo6 version of workbench!! | ||
Bud |
the drilling was the hard part, and they are hot !! but i love theme  | ||
Garyz28 |
I installed mine last night. I bought a new titanium drill bit for the job, so it only took about 10 minutes to drill both holes. It took about 1 1/2 to do the whole job. Now I'm dying to go for a ride out in the cold to see how well they work but it's been raining non stop since yesterday and I'm not quite that anxious. | ||
Bienhoabob |
OK, I brought the kit and started installing the heated grips. Come to the drilling part on the left handlebar. After buying a new cobalt drill bit, and spending a good hour trying to drill one hole, I'm about half way thru the thing. The two screws are to hold the left grip on. So I'm thinking, why not just use some handlebar grip adhesive and forget all of the torture that I'm going thru? It shouldn't mess anything up. Right? Miller time. | ||
Treysmagna |
I just u7sed grip glue on mine. DIdnt drill the holes | ||
Bienhoabob |
Thanks Trey, my life just got a whole lot better. | ||
Treysmagna |
Well, i guess the only draw back to glueing them is if you wanted to change bars for some reason. But, mine have been working great. Nice and hot! | ||
Garyz28 |
Did you try using oil when you were drilling? Seriously, it only took me about 10 minutes to drill both holes. I just used WD-40. | ||
Zac4mac |
Ditto that Gary. Broke the provided bit here too. Had to drill twice, used the wrong index hole the first time and a lot of cutting oil. Didn't realize they were Cro-Mo, I knew they were tough. Nice pictorial, Bearly. I took a bunch of photos while I did my 1125R, but was too lazy to put a tutorial together. Instructions were good, except they didn't say I needed to pull the fairing. I'll be needing them this morning, it's 8˚ F right now. Z | ||
Johnboy777 |
I just ordered the grips last week - do I need to buy an extra bit prior to the install?? If so, what size?? Thanks, John H. | ||
Bienhoabob |
From Bearly's post above. (recommend having a couple of extra hard (Cobalt, Titanium, 9/64ths, 3.6mm) bits to get through this part.) | ||
Johnboy777 |
From Bearly's post above. (recommend having a couple of extra hard (Cobalt, Titanium, 9/64ths, 3.6mm) bits to get through this part.) ....D'oh! . | ||
Josh_ |
Step one of the grip install for the wife's XB12Scg is complete. She didn't want a switch permanently mounted, so I made one we can easily remove for mid-spring through mid-fall riding and put on when it gets cold. Battery holder $1.79 Switch $3.49 (wanted a smaller one then is included with the grip kit) Trailer light extension kit $4.99 Heated grips $25 ProGrip Gel grips $8 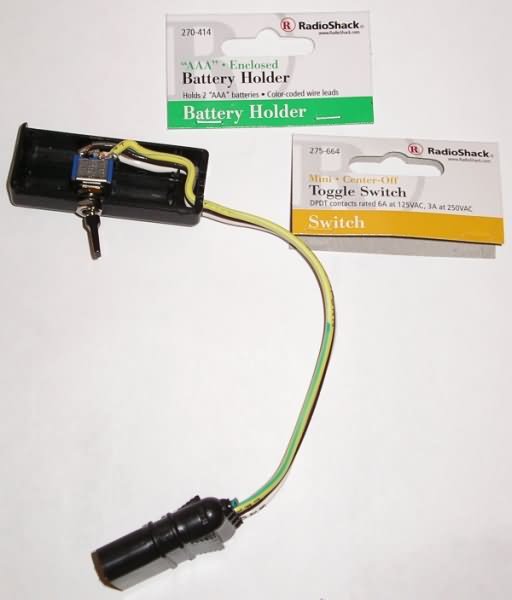 |