| Author | Message | ||
Biker_bob |
I looked thru the search engine and couldn't find this anywhere. The little foam strips that say go on the side bag bracket at E, which way? Anybody out there know. They are the ones with the foam and the peel off sticky tape. The drawing just shows them on the frame of the rack but they are thicker on one side with a flat place. Answers? Thanks in advance. | ||
Dragon_slayer |
Bob, those are for the bag side reflectors. The pieces of stiff clear tape are for the brackets. | ||
Javadog |
Those directions are terrible. The least they could do is provide a few decent pictures for our $999. Mine had clear tape strips but I may just put on a little black duct tape instead. Everything works better with a little duct tape on it, plus you can use it to make an improvised dressing for those annoying spurting arterial wounds. | ||
Dragon_slayer |
Javadog, if you had paid the second level price of $999.95, it came with five very nice pictures!  | ||
Biker_bob |
Thanks I got it now. I agree they stink, that way it can't be my fault.  Thanks! | ||
Brat |
What "pieces of stiff clear tape", mine came with stiff clear pieces of plastic, are they supposed to be sticky? For sale, unused stiff clear pieces of plastic, reflectors and some other sundry mounting items: free to good home! | ||
Dragon_slayer |
Brat, did Dave knock some money off for not including the "sticky"? Maybe it's some kind of importing regulation! Wait, wait, I just had an ideal, try peeling off the backing!  ORANGE Ulys rule! | ||
Biker_bob |
Actually the stiff piece of plastic peels off to give you the sticky tape for the bracket as dragon slayer says. I can not believe how bad the right bracket was. I had to take the peg bracket all the way loose to get the bolt in it. The left went together easy. I was surprised to see no anti seize or loctite on the peg bracket bolts. I put anti seize on them before I put it back. How long until the reflectors fly off? I put them with the alcohol and all but that doesn't look like a great system. | ||
Brat |
Must have got frozen getting here, if it has a backing strip damned if I can get it off?  Not having them on makes it easy to get the bags on and off, they're a neat fit, they may flog a bit with a bit of weight in them???? | ||
Crusty |
I just put my bags on two nights ago. The clear plastic has a clear backing that peels off. I automatically removed both footpeg mounting brackets, since I was forewarned by this forum to do so. However, I had to run a 1/4 - 20 tap in the mounting hole on the left side bracket to clean out a bit of the hardcoat/powdercoat that was fouling the threads. Other than that, it was a pretty straightforward job. I had no problems with either the instructions or the photos. Javadog, $999 is a bargain for saddlebags of this caliber. My wife has a Moto Guzzi Breva 750, and the 30 liter bags for it (sold as Moto Guzzi bags, but made by Hepco&Becker) cost the same, and didn't include a top rack or trunk. My biggest bitch is that the plastic piece on the bags should have been painted Orange to match the beautiful bodywork color instead of that Champaign. Now, I can fill the bags and ride to Daytona to watch the Buells run in the 200! | ||
Dragon_slayer |
Ut, oh Crusty, now you have done it! Duck! Incoming Black Uly remarks. Btw, I did not have to fool with my foot peg brackets. Just ran all the new bolts in and out of their threaded holes without the brackets. Then installed both bag brackets along with the cross brace very loosely, adjusting each as needed until all bolts fitted into their holes. Then removed each bolt one at a time, applied "Locktite", reinstalled and tighten fully. PIECE OF CAKE! I notice that it helped to handle both brackets at their bottom rear corner to align the foot bracket bolts. Shoved bracket up and back, plus in or out as needed at that rear lower corner. Was a big help to align bolt! | ||
Csg_inc |
Help I lost the installation instruction sheets for the topcase. I have the one for the side bags. Could someone send me a scan or fax me a copy of the installation sheets for the top case. Thanks PM me for the fax number DAVE | ||
Biker_bob |
I sent a pm to you. Can do in about 4 hours. | ||
Brat |
I used a spanner as a lever, it felt like the plastic around the rear-most hole was stopping the frame from aligning, reasonably easy! 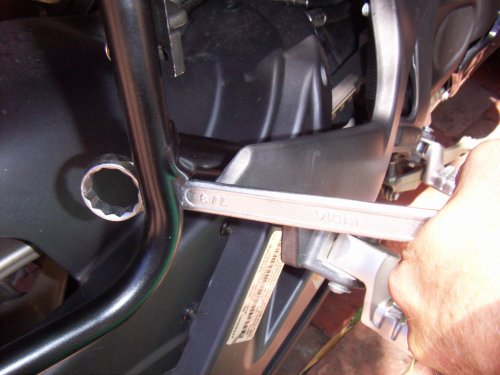 | ||
Biker_bob |
To put my right one on you would have needed about a six foot cheater bar on that spanner. CSG I faxed that info one the top case to you. (Message edited by biker_bob on January 27, 2006) | ||
Csg_inc |
Biker_Bob thanks so much I got it. | ||
Dragon_slayer |
Brat, when it's metric size - you can call it a spanner. When it's American size (such as the one in the picture) we call it, a wrench! Just trying to help!  | ||
Guybones |
All, I just put my side bags on (no top case), and following Slayer's lead, it was, in fact, a piece of cake! I'm leaving them open overnight however, massive offgassing! Oh, re: the clear sticky rack guards, I can see why you might want one near the latch, but top & bottom? The bags already have very sweet rubber dowels top & bottom where they contact the racks???  |